If you want to disable or remove default image sizes from wordpress theme. Than use code in them file. wordpress creates more than five images while upload.
remove default image sizes from wordpress theme
Every custom wordpress theme has their different thumbnail sizes defined. When we upload any image to wordpress, By default wordpress create four resized images. Means when we upload image, wordpress upload five images on server. Which is not necessary and unwanted. If your theme added, custom thumbnail sizes then it create more than five images and upload on server.
We used above code in our wordpress theme. Now while image upload, we are storing only three images on server. which saves the disk space.
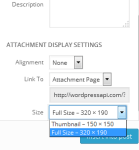
If you want to remove unwanted image sizes from wordpress theme. Sometime you need the original and thumbanil image only. But many wordpress themes creates the multiple image version in your site which is not useful. Although it is possible to prevent the creation of default image sizes by changing their dimension settings to ’0′ in Dashboard > Settings > Media, these image sizes will still appear in the list of sizes in the Media Uploader.
Why use above method in wordpress theme
Due to custom thumbnail sizes your server images data will always increase. Some image sizes are not important for bloggers and website. So why to create unwanted images and store on server.
remove default image sizes from wordpress theme
You can always full sized image in website. Just fixing image sizes use following CSS code.
[viral-lock message=”Solution code is Hidden! It’s Visible for Users who Liked/Shared This article on Facebook or Twitter or Google+. Like or Tweet this article to reveal the content.”]
Do you own a WordPress website? Do you want to include a table price list in your WordPress site? If your answer to both these questions is a “Yes” then you’ve landed on the right post. Here, I’ll be making you familiar with one of the best WordPress plugins that work as the best option for incorporating a table price list in WordPress powered websites. Backed by an easy-to-use interface, wpDataTables is the perfect solution for a number of “dirty” technical jobs such as: embedding the HTML Tags to the text, converting the table types and many more. The best part of using wpDataTables plugin is that you can do all this without the need for performing any complicated coding.
WpDataTables plugin- Understanding it in and out
Why there’s a need to add tables into a WordPress website?
Well, there are a number of reasons backing the importance of adding tables to the WordPress posts and pages. One of the best reasons is the ability of a table to add an incredible amount of content in an easy-to-interpret and legible format. Whether you’re inclined on adding a table regarding the different business locations, a list of all the upcoming events along with dates and locations or a directory containing details about different employees; wpDataTables is a plugin that allows you to convert your ideas into reality.
WpDataTables plugin- A look at its history
Published in the year 2013, WpDataTables was introduced as a small plugin for WordPress enriched websites, WpDataTables has evolved into a fully-featured plugin. Being constantly improved by a lot of WordPress designers and developers, WpDataTable plugin has played a vital role in the creation of re-stylable, responsive and fully-functional tables, to be included within WordPress posts and pages. With innovative features being added to WpDataTables plugin with each passing month or two; WordPress designers and developers can now enjoy a fuller experience of adding tables that are more functional and customizable. The company behind WpDataTables plugin is planning to introduce new features in the plugin including eye-catchy skins, a WYSIWYG table constructor and pricing tables.
What’s wpDataTables plugin best suited for?
Currently being used on over 1000 WordPress websites, wpDataTables plugin is a perfect solution for a range of jobs including the ones mentioned below:
Incorporation of any kind of tables that are responsive in nature
Incorporation of catalogs and other kinds of tables that are fully editable from the front-end
Incorporation of searchable price list tables and catalogs
Ajax-based rendering(on the front-end) of large datasets comprising of thousands of records.
WpDataTables- A brief on its working
Adding responsive data tables into a WordPress post/page has become really simple. All thanks to the superb WpDataTable plugin. All you need to do is install it into your site and you’ll be able to add a new table, select and upload data source, followed by inserting the shortcode(generated by WpDataTables plugin) anywhere across the entire website. And that’s not all. You can gain an easy access to a large number of features including grouped rows, fixed headers, charts as well as numerous customization options such as color, fonts and translations.
And now, some simple steps on using WpDataTables plugin
Step 1- After the download and installation of WpDataTables plugin, start off with creating a new table
As per this step, choose the option ‘Add a new table’ in the WP Admin menu and set the table parameters including: table name, table data source(Excel file, MySQL, CSV file etc.). In addition to this, you’ll also need to define extra table parameters such as: whether you intend to display the advanced filters below each column, whether you want to show buttons for exporting data to CSV, what is the count of rows that you want to be displayed on one table page, whether you want the table to be a conventional one or responsive, and many others. Once you’re done with selecting values for all parameters, click on “Save table” button.
Step 2- Set up the column properties
Although this is an optional step, but I recommend you to follow it without fail. Here, you need to define a unique name for each column. This name would be used in place of the original column header. In addition to this, you’ll also be required to set the column type for handling data as a number, string or date. You can also choose to filter each column by a text input, data ranges, selectbox dropdowns, number ranges etc. Last, but definitely not the least, you can also change the display order of the columns by performing simple drag and drop function. Hiding the columns is also possible here. Once you’re done with making changes to the columns, click on “Save columns” button.
Step 3-Publish the table
In order to publish the newly created table, all you need to do is simply copy and paste the table shortcode that’s available in the admin page header part to the WordPress post or page. After you’re done with this, save the setting and the table will start appearing on the WordPress website’s front-end.
So, with the successful execution of the aforementioned third step, you’re done with incorporating a table into your WordPress post/page.
What makes WpDataTables plugin a right fit for thousands of WordPress driven websites?
Unlike a wide range of WordPress plugins that are used for creating editable responsive tables, WpDataTables plugin is considered as one of the high-rated plugins that are being actively maintained and continuously enhanced by a huge population of trained WordPress designers and developers. Here’s a look at some of the best features of WpDataTables plugin that have impressed one and all: Can fit any requirement- Quite dissimilar to many WordPress plugins which are restricted to just offering the flexibility of adding tables into posts and pages, WpDataTables plugin is best suited for equipping WordPress posts and pages with catalogs, bugtrackers, front-end DB management, pricing tables and many more. Is highly editable– With WpDataTables plugin, you gain the flexibility of editing the MySQL data directly from the website’s front-end, without the need for doing any complex coding. Has a flexible and easy-to-customize design- WpDataTables plugin has been tested on a large collection of WordPress themes. That means, on installing this plugin into your site, you need not worry about the distortion of your site’s original theme/design. Full responsive- WpDataTables plugins works as the best tool for creating fully responsive tables that comprise of collapsable rows. And the best part is that you can create such tables with a simple click of the mouse. Lifetime technical support and free updates- Seamless technical support and timely updates are the two major concerns of every WordPress website owner who has chosen to install a particular plugin in his/her site. With WpDataTables plugin, you need not worry about both these scenarios because the plugin offers you free lifetime updates along with a round-the-clock technical support for a wide range of issues regarding the installation and use of the plugin. It is interesting to note that everyone who has chosen to download and install WpDataTables plugin has displayed utmost satisfaction regarding the use of plugin for creating flawless tables, catalogs, flow charts etc. WpDataTables plugin has already received excellent reviews from WordPress site owners across the globe.
Wrapping it all up
With all that being said about the performance of WpDataTables plugin, its time for you to choose the same for your WordPress website. I’m sure, post installation of WpDataTables plugin, you’d definitely be able to meet all your customized needs that have been bothering you since a long time.
wordpress shortcodes are used in custom themes and plugins. so here in this wordpress tutorial, we will show, how to create custom shortcodes in wordpress theme.
Here using following code you can create simple shortcode. You just need to copy and paste following code in functions.php file (theme folder). If you cant to use shortcode for plugin then add this code in plugin file.
//[simple_shortcode]
function simple_shortcode_function( $atts ){
    return "foo and bar";
}
add_shortcode( 'simple_shortcode', 'simple_shortcode_function' );
Using attributes you can create short code as follows:
Above we created simple feedburner subscription short code. You can use above short code as follows:
[rssfeed_subscribe subtype=”RSS”]
Be sure to subscribe to future WordPress API updates
[/rssfeed_subscribe]
Here in this wordpress tutorial, we shown, how to add feedburner email subscription wordpress without plugin. Feedburner is free email subscription service by google feedbuner. You can open account using Feedbuner website.
Feedburner is free option, Feedburner is great email subscription tool, Still as compare to other paid services. Feedburner is good but I miss many features when I compare to other paid.
Why Email Subscription Popup is important.
There are many paid services offered email subscription popup functionality. They said, They will boost your your site visibility and subscribers. But you can get email subscription popup for free so, why need to pay. Google is given reputed feedburner service.
But not to worry, google still not going to stop feedburner email subscription free service.
add feedburner email subscription popup wordpress without plugin
Here we given code for creating feedburner subscription popup in your wordpress theme. You just need create subscription.php file in theme folder and put following code in that file.
Without writing too much, we given code. If you want to download script and images which are used in script, than use following URL.
[viral-lock message=”Download Link is Hidden! It’s Visible for Users who Liked/Shared This article on Facebook or Twitter or Google+. Like or Tweet this article to reveal the content.”]
Broken links are harmful for wordpress website SEO. In wordpress tutorial, will show you, how to check broken links in wordpress. How to fix broken links. Broken links are bad and annoying, Broken links will give the bad impression to user about your wordpress website.
Why Broken links are not good for SEO.
Hare are Google listed Webmaster Guidelines, you can clearly see that broken links are mentioned in guidelines. Google is mentioned about broken links. Check “Design and content guidelines” section. Google clearly says following point.
Check for broken links and correct HTML.
If Google is giving guidelines about broken links than, it is so important we should check broken links in wordpress and fix or remove broken links from wordpress site. Google actually penalized webpages which has broken links and it affect your search engine page rank.
How Broken links will be generated on wordpress website?
Main reason behind broken links which we found is, comments. Many commenter use fake domain names and URLs which does not exists. So while approving comment, check URL which posted by user. Another reason is wordpress themes. Many people change their wordpress themes. Some times, when theme has different custom image sizes are used in theme, Images are not found which are specified in theme. So whenever you change your wordpress theme, check images are not broken.
Some time you use reference URLs in wordpress site. If webmaster shut down their sites than reference URL will be broken. So you need to check broken URLs on regular basis.
We recommend to check broken URLs at least in one month.
how to check broken links in wordpress website
We found useful wordpress plugin for checking and fixing broken links. You need to install following wordpress plugin.
This plugin will check your posts, comments and other content for broken links and missing images, and notify you if any are found. This plugin will monitor your blog looking for broken links and let you know if any are found.
Features
Monitors links in your posts, pages, comments, the blogroll, and custom fields (optional).
Detects links that don’t work, missing images and redirects.
Notifies you either via the Dashboard or by email.
Makes broken links display differently in posts (optional).
Prevents search engines from following broken links (optional).
You can search and filter links by URL, anchor text and so on.
Links can be edited directly from the plugin’s page, without manually updating each post.
Highly configurable.
How to Use Broken link checker plugin
After activating the plugin, go to Tools » Link Checker. plugin will work in background and find out the website has broken links. If you have the large amount of posts than it will take some time depending on your server capability.
If your site has no broken links than you will see following screenshot.
How to Use Broken link checker plugin
If you site has broken links then you will see following result. In this screen shot we shown you how to fix broken links. There are some options can be found for each list item. Following are options.
Edit link
Unlink
Not Broken
Dismiss
how to check broken links in wordpress
You can choose option which you want. From list page you can edit URL and fix link. If URL not exist than you can unlink URL.
After you are fixing of all broken links. You can disable this wordpress plugin and After one month you can again process same thing. This will increase your website page ranking and users will not get bad impression about your wordpress website.
Many times we need older version wordpress plugin and themes for old project. Some times due backward compatibility issue we need older version of wordpress plugins which are supported to older wordpress themes.
download older version wordpress plugin and themes
Here we will show you show how to download older version. First go to wordpress plugin directory page.
Than search for plugin which you want to download. Go to plugin landing page and click on “Developers” tab. This tab will be last tab on this plugin landing page.
download older version wordpress plugin and themes1
Here we given sample image for download older version.
You will be able to see the all all older versions of that plugin. Under “Other Versions” section we will be able found all older versions.
Why older versions are needed?
Many times we need older version wordpress plugin and themes for clients which are using old wordpress version for their project. Some times we observed, After becoming wordpress plugin so much popular, some plugin developer started the pro version which is paid version. For plugins paid version you need pay. In newer version they removes and limits the functionality to attract the users. You can find all functionality in older wordpress plugin and you do not need pay money for this. You will get all functionality without paying money.
How to check Plugin version Compatibility
For checking older plugin Compatibility with your wordpress version. you need to select your wordpress version in “Compatibility” section and then select older version of plugin. You will able to see the “Not enough data” or “Works!” status. This is how you can check older plugin is compatible with your wordpress version.
This is very useful when you are working with customers who are using the older wordpress versions for their websites.
As per wordpress pages, we can limit number of wordpress posts in rss feed. Through RSS feed (feedburner and other feeds) we can subscribe to any website. RSS feed need to managed properly and shown to user. Some client and webmaster want to show limited nuber of post to user in RSS feed view, It is encourage-able to visitors to view your site.
how to limit number of wordpress posts in rss feed
What you need is, First login to worpdress admin panel. Than go to Settings » Reading page in your WordPress admin dashboard menu (left side).
WordPress itself given you facility to control RSS feed post numbers through wordpress admin panel itself.
[viral-lock message=”Setting image is Hidden! It’s Visible for Users who Liked/Shared This article on Facebook or Twitter or Google+. Like or Tweet this article to reveal the content.”]
how to limit number of wordpress posts in rss feed
[/viral-lock]
After this, Find ‘Syndication feeds show the most recent’textbox option and change the value(number) which you want to be shown to user in RSS feed page.
You will find “For each article in a feed, show ” radio box there, Choose option what you want to show to user in RSS feed. We suggest you to use “Summary” because it will be good for SEO purpose. Than Just save the changes.
Than go to your RSS feed page. If you dont know RSS feed page than use following link. Do not forget to change the your domain name.
For interlinking articles in wordpress, we need to install and configure SEO smart links in wordpress. Here we given steps and screenshot with their details. In following article we already written, why interlinking is important in any website.
how to configure SEO smart links in wordpress website
SEO Smart Links (https://wordpress.org/plugins/seo-automatic-links/)
how to configure SEO smart links in wordpress website
SEO Smart Links provides automatic SEO benefits for your site in addition to custom keyword lists, nofollow and much more.
SEO Smart Links provides automatic SEO benefits for your site in addition to custom keyword lists, nofollow and much more.
SEO Smart Links can automatically link keywords and phrases in your posts and comments with corresponding posts, pages, categories and tags on your blog.
Further SEO Smart links allows you to set up your own keywords and set of matching URLs. Finally SEO Smart links allows you to set nofollow attribute and open links in new window.
It is a perfect solution to get your blog posts interlinked or add affiliate links to other sites.
Everything happens completely transparent, and you can edit the options from the administration settings panel.
configure SEO smart links in wordpress
We have given the screen shot of each and every step. Using above screenshot, configure “Internal Links” section. Please Use setting as per shown in image.
Settings section
Using above screenshot, configure “Setting” section. Please Use setting as per shown in image.
Limits section
Using above screenshot, configure “Limits” section. Please Use setting as per shown in image.
Here is Video tutorial for configure SEO smart links in wordpress
SEO Smart Links – Premium Edition
SEO Smart Links is a very powerful plugin which suits both beginner users (with a plugin&play philosophy with optimal options pre-set) as well as those proficient in the art of SEO with numerous customizable features.
SEO Smart Links – Premium Edition enhances your search engine rankings by automatically inter-linking your posts either in automatic or in user-set mode. It also helps you manage your affiliate links and much more. Click to read the full list of features and buy here.
Our Review:
SEO smart link is really smart in terms of behaviour in wordpress webpages. It is quite fast as compared to other wordpress plugins which has used for interlinking. We experienced good amount of traffic increase and page view increases. The important part, It decreases the bounce rate.
Many times we receive unwanted spam comments email notification from wordpress website. We personally faced comments email notification issue so many times. Many of our clients also faced this issue. WordPress itself given facility to turn off wordpress comment email notification using wordpress admin section. WordPress by default enable the all email types of notification on.
turn off wordpress comment email notification
In this article, We will show you, how to turn off wordpress comment email notification. Using wordpress administration you can switch off wordpress comments email.
Login to WordPress site dashboard. In left side menus, go to Settings » Discussion. Then look at where it says “Email me whenever” and “Before comments appear” un-check the boxes there.
turn off wordpress comment email notification
Please Use setting as we shown in above picture and save the settings. After this your email notification will be off. Using Other setting “Comments author must have a previously approved comment”. Uncheck that checkbox also. So previous commenter will never publish there comments without your approval.
Why turning off wordpress comment email notification is good?
WordPress send email notification through your server. Many times from sendmail server. If you are getting the huge amount of spam comments than, Your server will try to send email for every spam comment. It will use huge amount memory and server CPU. In that can first stop comment email notification.
Additional Comments setting
On Discussion Page we have “Comment Moderation” section. This setting about spam comments. In textbox you need to add words which you think could be spam related wrods than you can put those words there.
When a comment contains any of these words in its content, name, URL, e-mail, or IP, it will be held in the moderation queue. One word or IP per line. It will match inside words, so “press” will match “WordPress”.
You should add some spam comments related words. We will write about “Comments Moderation” in next coming days.
The quality development services has to be characterized by many facets, but what dictates success or failure the most is the development platform you are choosing.
Off late, there has been a lot of clamor and hype over various web development platforms that have surfaced. And each name has been greeted with confidence and also a lot of doubt and contemplations. And it is already known by those working in this realm that there are choices galore. Choosing one of the zillion options available is a task too challenging and prone to errors.
Perfect Combination for a Successful Web Development Project
Perfect Combination for a Successful Web Development Project
However, if there is one platform that has had the biggest share of proven success till now, it undoubtedly is PHP that rules over the rest. And the claim is proven by the sheer track record it boasts of and the number of exceptional web applications that have been floating around in the web verse that have the PHP stamp all over them.
And What Makes PHP Such a Good Choice
Perfect Combination for a Successful Web Development Project
In the development market, there is also a lot of fluff in the form of web development software and platforms that hardly serves the purpose. Even though there is no dearth of brands that actually leverage these platforms to develop their web applications, the underlying truth is that these platforms toss at them various bottlenecks that make it seemingly impossible for them to achieve the level of results that they have invested for. These platforms aren’t as flexible as PHP and neither are they so powerful as to create some amazingly high scale applications that make a serious boast.
Now, PHP also happens to be one platform that not just makes a serious claim for being powerful, but developers also find it simpler and more practical to code using this platform. The intrinsic code set up in PHP is such that there isn’t a lot of scope for complications to creep in and confuse the coder in the loops. It is made with a straightforward approach with attention to details. But those details are not woven in a manner that would make it arduous for programmers to create a program that contains a fair bit of code quantity, but one which does not overshot the number of lines required.
And as far as the scalability of this platform is concerned, there is hardly an equal on that front either. There is an assured degree of flexibility to the PHP frameworks that lets them be stretched beyond the default levels and helps developers in getting amazingly creative, without having to worry about the seemingly bounding restrictions that other frameworks are characterized by.
One of the more serious concerns that troubles the developers of the world is the fact that they have to be content with the security threats that web applications are under. And this is again where they are looking for alternatives that can let this worry be out of the picture so that the developers can focus more on the core aspects of application development. And this is a definitely some where PHP scores emphatically. The whole suite of PHP security and authentication features prove to be handy in thwarting the hacking and intrusion attacks that trouble the developers much too often.
How Else Can You Ensure Good Quality
Perfect Combination for a Successful Web Development Project
Now, having charted down all the incentives associated with choosing PHP for your web development project, what needs to be told with a equal degree of relevance and significance is how you can ensure that even after choosing PHP, you do not suffer from lack of project quality? Well, first of all, you need personnel you can trust with your platform, tools and the overall project requirements.
If you have the developers on board who are astutely expert in PHP and are experienced in developing the most large scale and powerful PHP applications, that takes care of all the major and minor facets of PHP development. Having reliable developers is a key to success in any PHP development project, and if you are handing over your project to novices instead, you are doing disservice to the whole project and its prospects.
When you are relying on a traditional recruiting method of hiring developers by advertising on job portals, you should be prepared in advance for handling the galore of applications that will come your way from the job seekers.
It is also advisable that you start looking for the preferred developers on the PHP communities that exist in abundance on the Internet. On these communities, you stand a better chance of hiring people who are adept at their job and have been answering queries of people asking questions regarding PHP on the public platform. You can scroll through the questions and answers on these communities which can give you a fair idea of which developer’s skills are more attuned to your project requirements. Also, their online portfolio can also give you an insight into their skill and their experience levels.
So, it mostly boils down to the development platform you choose – a decision that should be leaned towards PHP – and the kind of developers you hire based on their skill set and their experience. When you are sure that what you have at your behest conjures up the formula for success, you can kick off the project with greater surety.